Webflow’s Hidden SEO Power: Automating Structured Data with Your CMS
Introduction
Every website builder has its quirks—especially once SEO enters the conversation. When I cracked a way to let Webflow handle my structured‑data chores automatically, everything changed. And what is Webflow beyond the marketing spiel? Picture a drag‑and‑drop design studio fused with a full‑blown CMS—no manual code wrangling. Hidden inside that CMS is a little‑known trick that now saves me hours, slashes errors, and keeps my schema perfectly up‑to‑date.
Let me show you how.
A few months back, I was working with a client whose organic traffic was slowly declining. Her site had all the usual SEO hygiene in place—title tags, optimized copy, internal linking. But because it was content-heavy, there was too much overlapping information across similar pages, which left Google guessing. I consulted with a mentor, and we quickly pinpointed the missing layer: structured data, also known as schema markup.
On platforms like Squarespace, I could inject schema manually through code blocks—effective, but clunky. However, when I turned to Webflow for my own portfolio, I hit a wall. How could I assign unique schema to CMS-generated pages when the code was only editable in a single template?
Turns out, the solution was there all along.

Why This Webflow Integration Saves Hours
Here’s why schema markup is important for any content‑heavy site: it gives search engines unambiguous context, unlocking rich results that boost click‑through rates. Schema markup search engines essential context: Is this page an article, a product, a review? When implemented correctly, it increases your chances of being featured as a rich result—those visually enhanced listings in Google that drive higher engagement and CTR.
Webflow users often overlook schema because the platform doesn’t have native support for structured data. But if you're using Webflow CMS, you actually have a powerful workaround at your fingertips. By dynamically injecting CMS values into your schema code, you can set it up once, and it scales with every new blog post, case study, or project.
This isn’t just a Webflow integration hack—it’s a method that brings automation and accuracy to your SEO setup.
Step-by-Step: Automating Schema in Webflow CMS
1. Choose Your Schema Type + Plan Your Fields
Start by identifying the right schema type for your page. Common types include:
- Article or BlogPosting for blog content
- Product for eCommerce
- Event for calendar-driven experiences
If you're unsure which to use, check schema.org for an overview of types and their required fields.
For this article, we’ll use BlogPosting as the example. Here’s the minimum you’ll likely need:
- headline (Post Title)
- author.name (Plain Text or Reference field)
- datePublished (ISO 8601 format)
- image (Thumbnail or Cover Image)
- description (Meta Description)
In Webflow:
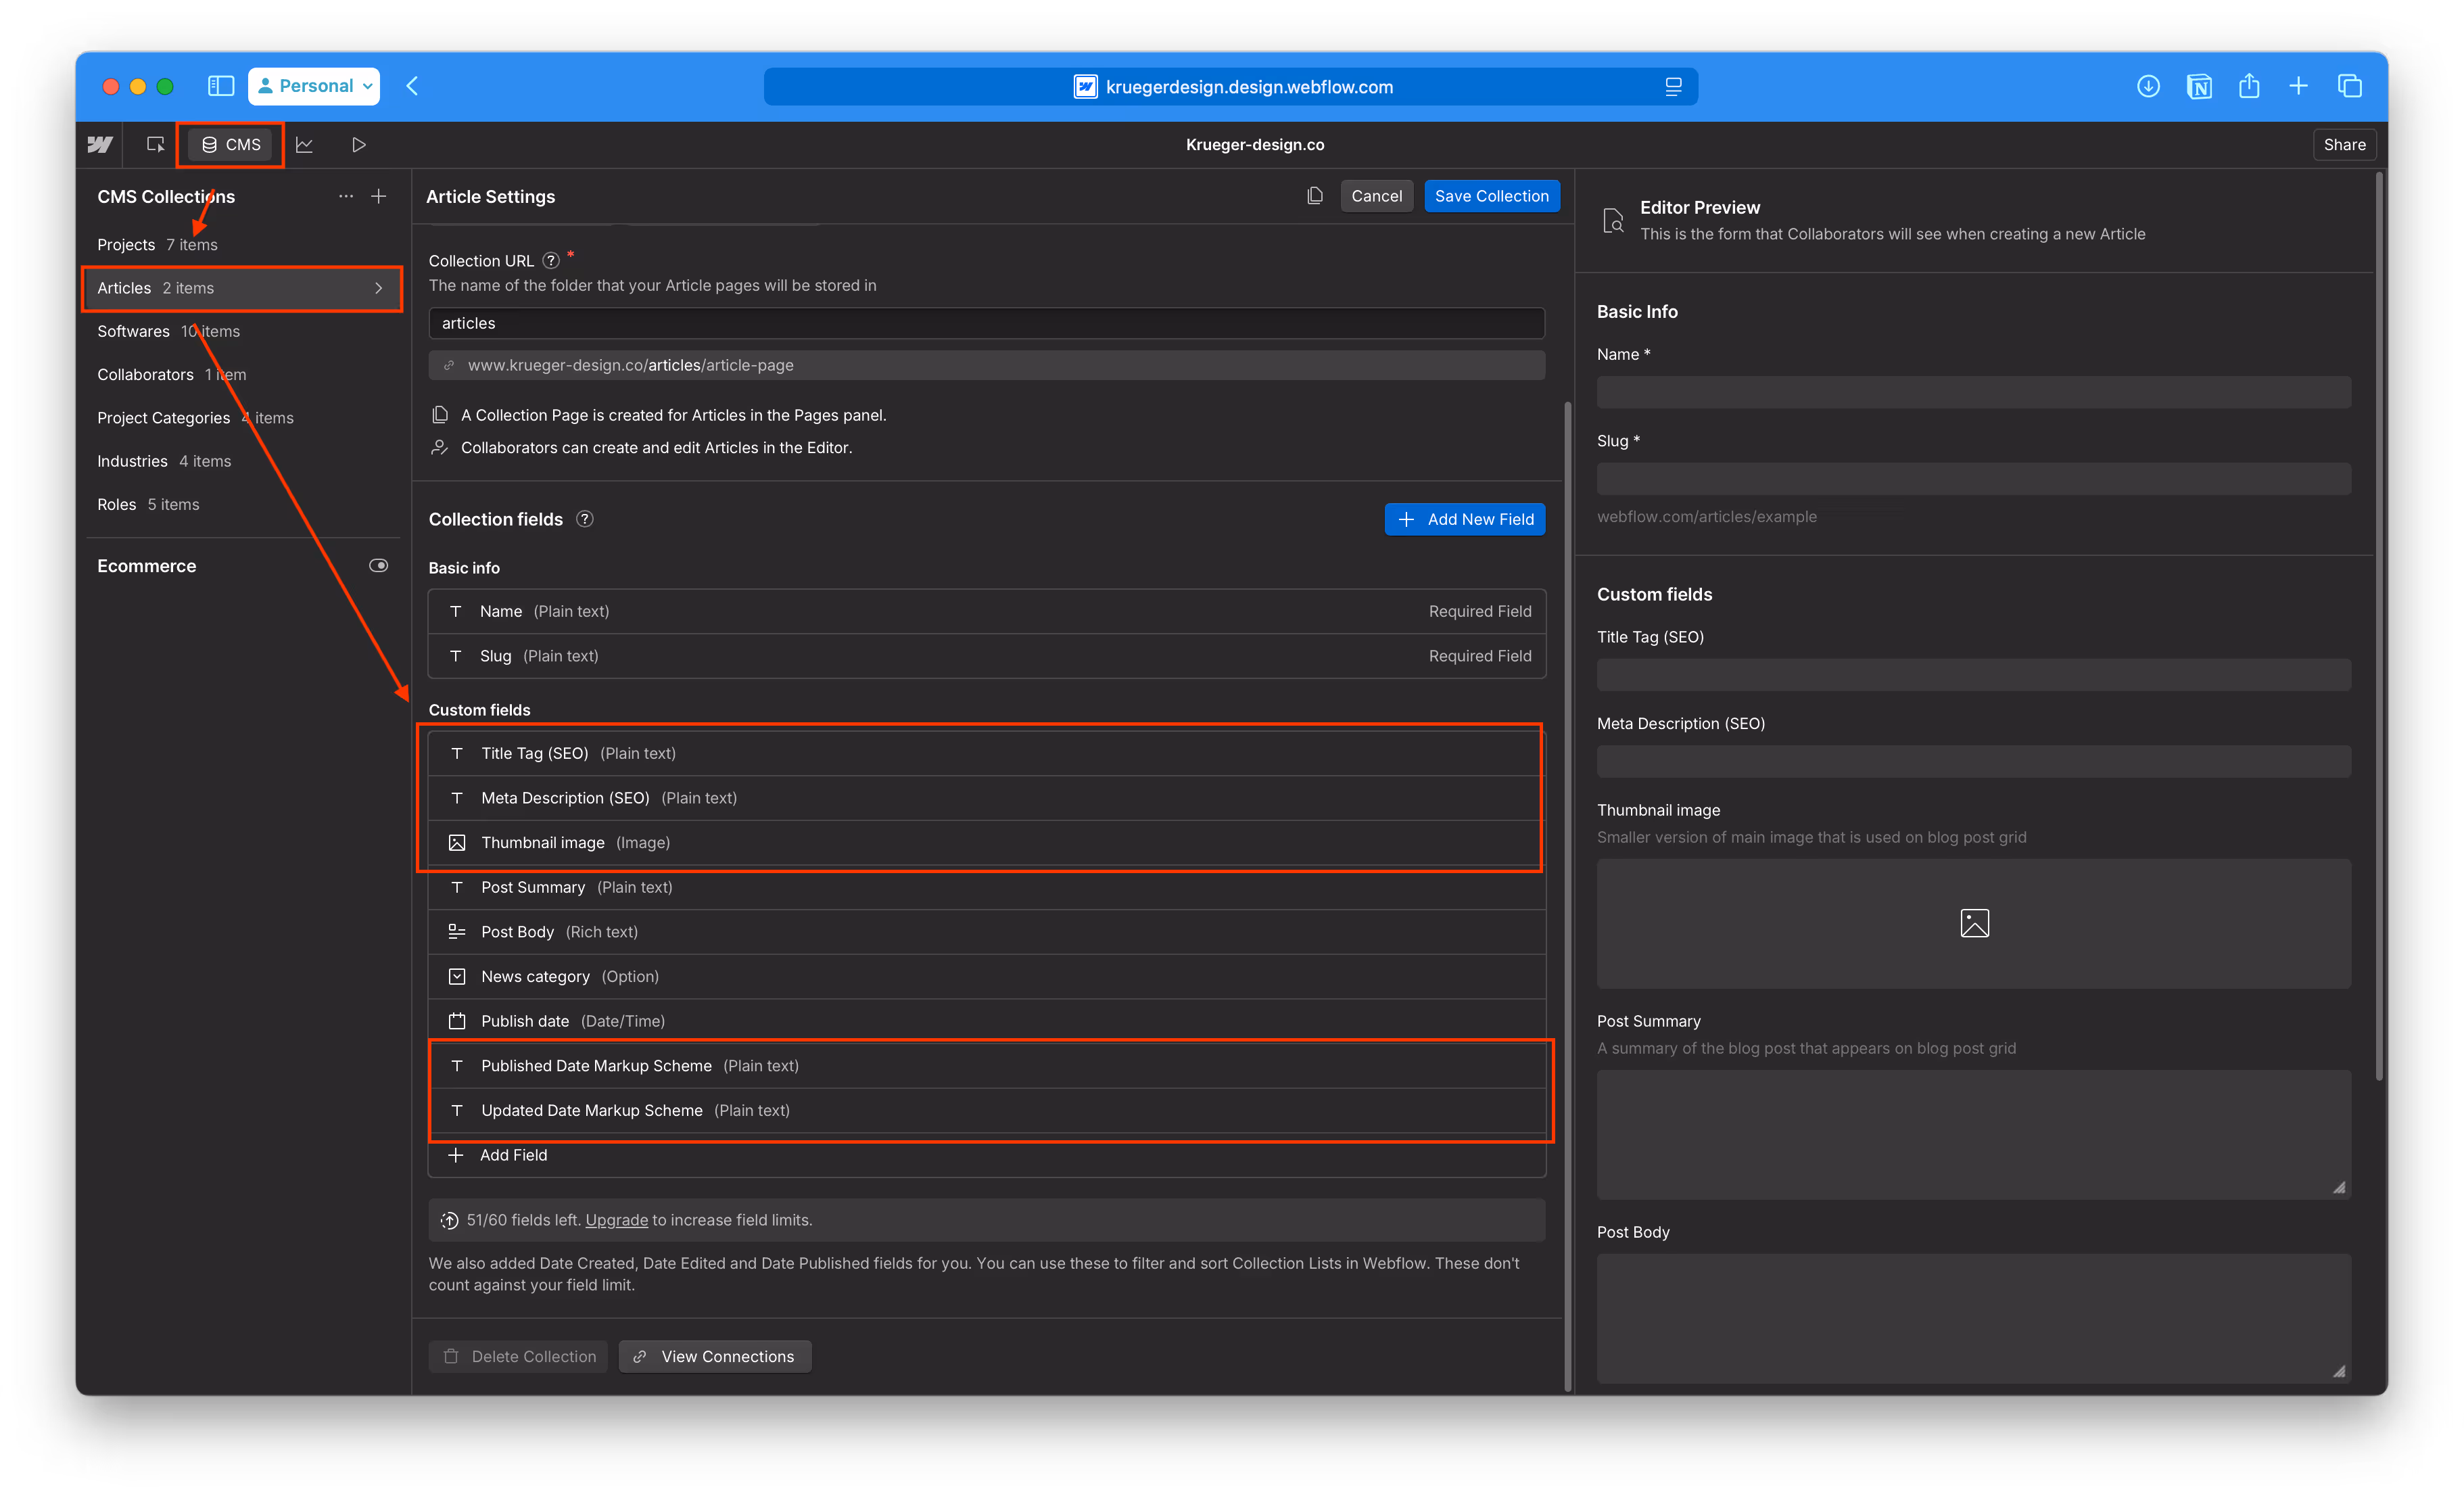
Go to CMS > [Your Collection] > Settings, and add plain text custom fields for each of these. If you want to include dateModified, create a second plain text field for that too, because Webflow’s native date fields won’t give you the ISO format schema requires.
2. Prepare Your JSON-LD Markup
Use a tool like ChatGPT to generate your schema markup. A sample prompt might be:
“Write me a JSON-LD schema markup for a blog article. Ask me questions needed to complete it.”
Once generated, validate it using Google's Rich Results Test or the Schema Markup Validator.

3. Add the Code to Your CMS Template
Now let’s inject that markup dynamically.
- Open your Blog Post Template Page in Webflow
- Go to Page Settings > Custom Code > Inside Head Tag
- Paste your validated JSON-LD code
Now, here’s the magic: instead of hardcoding values like "headline": "Sample Title", you’ll inject the actual CMS values.
In the code, select the title string, then click “Add Field” and select the matching CMS field (like Post Title). Webflow will insert a variable.
Repeat this process for every piece of content:
- Slug URL
- Meta Description
- Thumbnail Image
- Date Published (make sure it's in ISO format)
- Date Updated (make sure it's in ISO format)

4. Save, Publish & Validate
Once all variables are injected:
- Click Save
- Publish your site
- Run your newly created blog post through Google’s Rich Results Test
This will confirm if the markup is valid and whether it’s eligible for rich results.
Best Practices
- Use JSON-LD, not Microdata or RDFa (Google explicitly recommends this format).
- Validate every time before going live.
- Keep it lean—don’t over-tag your pages with irrelevant schema types.
- Watch your date formatting—it must match ISO 8601 (e.g. 2025-04-30T21:37:00+02:00).
- Leverage CMS plain text fields for full control and accuracy.
-
Google makes it clear: JSON‑LD is what is the recommended format for implementing schema markup.
Wrapping Up
What you’ve created is a scalable, automated SEO enhancement. Any time you update a meta description or title tag in the CMS, your structured data updates too. No copy-pasting. No errors. Just clean, maintainable code that search engines understand.
This isn’t a hidden feature so much as a hidden superpower. Once it’s part of your workflow, it changes how you approach CMS-based SEO entirely.
If you're already using Webflow CMS and haven’t set up dynamic schema yet, now’s the time. Your rankings—and your future self—will thank you.
Sources & Further Reading
- Google Developers – Introduction to Structured Data
- Schema.org – Schema Vocabulary Explorer
- Google – Rich Results Test Tool
- Google – Recommended Format: JSON-LD
- Webflow University – Custom Code in Webflow


